Good Info:
https://www.interserver.net/tips/kb/install-lets-encrypt-cpanel-whm-server/
https://lowendtalk.com/discussion/106071/installing-free-ssl-for-server-hostname-using-letsencrypt
Login to the server via ssh andlLet’s run the following command to install Let’s Encrypt provider:
/scripts/install_lets_encrypt_autossl_provider
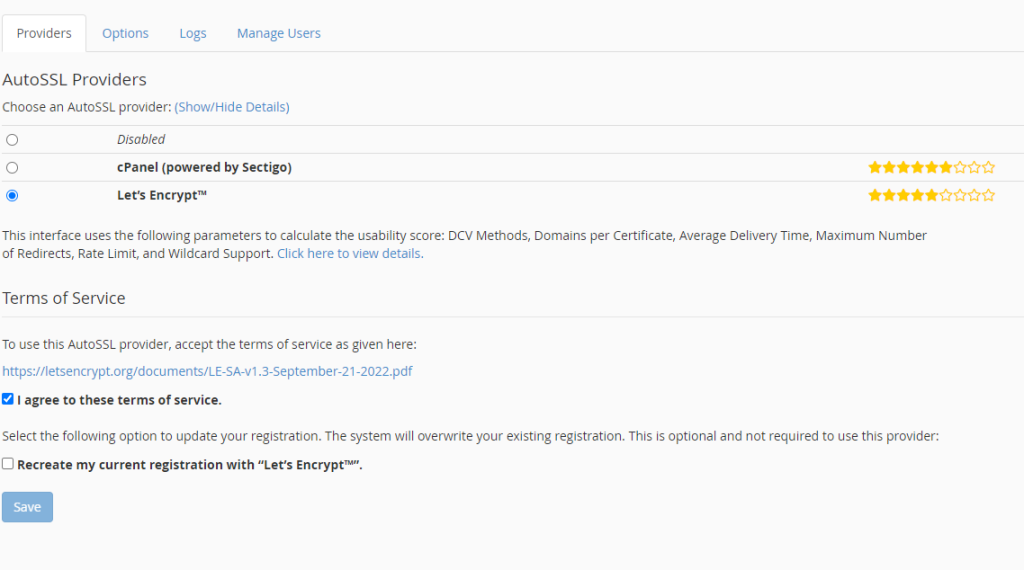
Once you have installed Let’s Encrypt provider, change auto SSL provider to Let’s Encrypt from cPanel (powered by Sectigo).
Login to WHM >> Manage AutoSSL.
Select Let’s Encrypt from cPanel (powered by Sectigo). Check the “I agree to these terms of service.”, and the “Recreate my current registration with “Let’s Encrypt”.
Install Self-Signed Certificate to Hostname.
Login to WHM as a root user. Go to “Service Configuration”.
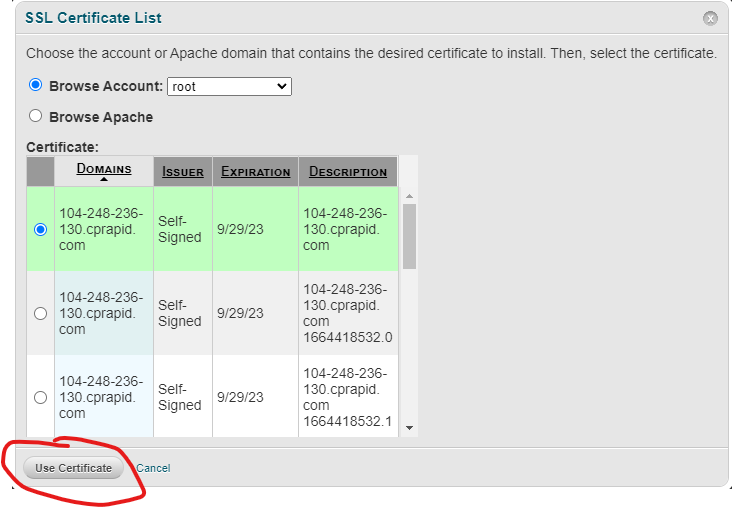
Then select the following services and click on “Browse Certificate”. Calendar, cPanel, WebDisk, Webmail, and WHM Services, Dovecot Mail Server, Exim (SMTP) Server, FTP Server.

Select hostname and click on “Use Certificate”.

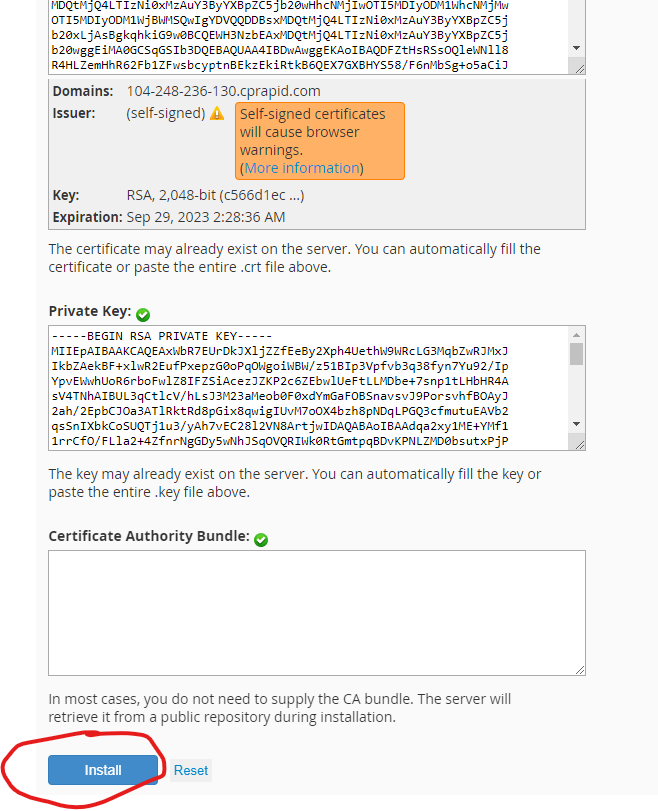
Then click on “Install”.
Restart cpsrvd
Replace Self Signed Certificates with Valid Let’s Encrypt Certificates.
Once you have installed the self-signed certificate, run the following command to check SSL certificates
/usr/local/cpanel/bin/checkallsslcerts --verbose
We can see the SSL CRT’s have been requested for your services. The hostname for the SSL CRT will be with one that is currently defined in cPanel:
# whmapi1 gethostname|grep hostname:
hostname: server1.hostname.com
While the process is not always this fast, after a few moments, we can see the SSL CRT’s are ready for install.
Then re-ran the ‘/usr/local/cpanel/bin/checkallsslcerts –verbose’ command which would have been ran at maintenance time. You may verify at WHM > Service Configuration > Manage Service SSL Certificates.
You can verify SSL installation by running https://server1.hostname.com:2087


