The Zabbix plugin actively sends information to a Zabbix server like:
Ceph status
I/O operations
I/O bandwidth
OSD status
Storage utilization
Login to the first proxmox node. In this case its px1.
Install Zabbix Aget 2- see Install Zabbix Agent2 Version 5.4 on Debian 10/11/
Install Zabbix Sender
apt-get install zabbix-sender
Locate the zabbix template:
 locate zabbix_template
/usr/share/ceph/mgr/zabbix/zabbix_template.xml
Cat the template to the screen and copy to a zabbix_template.xml file on your desktop.
cat /usr/share/ceph/mgr/zabbix/zabbix_template.xml
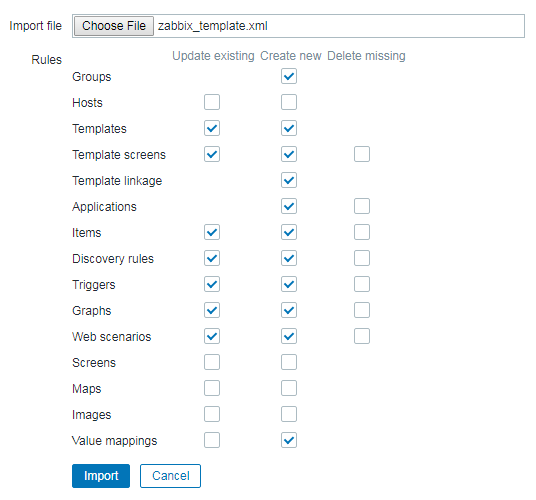
The Go to The zabbix server > Configuration > Templates. Click Import and load the file. Select the default values.
Add the template to the server you are monitoring in Configuration > Hosts.
You can enable the zabbix module with:
# ceph mgr module enable zabbix
Two configuration keys are vital for the module to work:
zabbix_host
identifier (optional)
The parameter zabbix_host controls the hostname of the Zabbix server to which zabbix_sender will send the items. This can be a IP-Address if required by your installation.
In this case, we use the config from the zabbix install for the zabbix server.
# ceph zabbix config-set zabbix_host monitor.geekdecoder.com
The identifier parameter controls the identifier/hostname to use as source when sending items to Zabbix. This should match the name of the Host in your Zabbix server.
In this case we use the hostname of the server being monitored:
# ceph zabbix config-set identifier px1.geekdecoder.com
Additional configuration keys which can be configured and their default values:
zabbix_port: 10051
zabbix_sender: /usr/bin/zabbix_sender
interval: 60
The current configuration of the module can also be shown:
# ceph zabbix config-show
Test the install and sending data:
ceph zabbix send
You should see “Sending data to Zabbix”
